Tag Archives: G1

Goodbye garbage collector – patching Android to make real-time camera image processing feasible

If you want to process camera images on Android phones for real-time object recognition or content based Augmented Reality you probably heard about the Camera Preview Callback memory Issue. Each time your Java application gets a preview image from the system a new chunk of memory is allocated. When this memory chunk gets freed again by the Garbage Collector the system freezes for 100ms-200ms. This is especially bad if the system is under heavy load (I do object recognition on a phone – hooray it eats as much CPU power as possible). If you browse through Android’s 1.6 source code you realize that this is only because the wrapper (that protects us from the native stuff) allocates a new byte array each time a new frame is available. Build-in native code can, of course, avoid this issue.

I still hope someone will fix the Camera Preview Callback memory Issue but meanwhile I fixed it, at least for my phone, to build prototypes by patching the Donut’s (Android 1.6) source code. What you find below is just an ugly hack I did for myself! To reproduce it you should know how to compile Android from source.

Avoid memory allocation

Diving in the source code starts with the Java Wrapper of the Camera and its native counterpart android_hardware_Camera.cpp. A Java application calls setPreviewCallback, this method calls the native function android_hardware_Camera_setHasPreviewCallback, and the call is passed further down into the system. When the driver delivers a new frame towards the native wrapper in return it ends up in the function JNICameraContext::copyAndPost():

void JNICameraContext::copyAndPost(JNIEnv* env, const sp& dataPtr, int msgType)
{
    jbyteArray obj = NULL;

    // allocate Java byte array and copy data
    if (dataPtr != NULL) {
        ssize_t offset;
        size_t size;
        sp heap = dataPtr->getMemory(&offset, &size);
        LOGV("postData: off=%d, size=%d", offset, size);
        uint8_t *heapBase = (uint8_t*)heap->base();

        if (heapBase != NULL) {
            const jbyte* data = reinterpret_cast(heapBase + offset);
            obj = env->NewByteArray(size);
            if (obj == NULL) {
                LOGE("Couldn't allocate byte array for JPEG data");
                env->ExceptionClear();
            } else {
                env->SetByteArrayRegion(obj, 0, size, data);
            }
        } else {
            LOGE("image heap is NULL");
        }
    }

    // post image data to Java
    env->CallStaticVoidMethod(mCameraJClass, fields.post_event,
            mCameraJObjectWeak, msgType, 0, 0, obj);
    if (obj) {
        env->DeleteLocalRef(obj);
    }
}

The evil bouncer is the line obj = env->NewByteArray(size); which allocates a new Java byte array each time. For a frame with 480×320 pixels that means 230kb per call and that takes some time. Even worse this buffer must be freed later on by the Garbage Collector which takes even more time. Thus, the task is to avoid these allocations. I don’t care about compatibility with existing applications and want to keep the changes minimal. What I did is just a dirty hack but works for me quite well.

My approach is to allocate a Java byte array once and reuse it for every frame. First I added the following three variables to android_hardware_Camera.cpp:

static Mutex sPostDataLock; // A mutex that synchronizes calls to sCameraPreviewArrayGlobal
static jbyteArray sCameraPreviewArrayGlobal; // Buffer that is reused
static size_t sCameraPreviewArraySize=0; // Size of the buffer (or 0 if the buffer is not yet used)

To actually use the buffer I change the function copyAndPost by replacing it with the following code:

void JNICameraContext::copyAndPost(JNIEnv* env, const sp& dataPtr, int msgType) {
    if (dataPtr != NULL) {
        ssize_t offset;
        size_t size;
        sp heap = dataPtr->getMemory(&offset, &size);
        LOGV("postData: off=%d, size=%d", offset, size);
        uint8_t *heapBase = (uint8_t*)heap->base();

        if (heapBase != NULL) {
            const jbyte* data = reinterpret_cast(heapBase + offset);
            //HACK
            if ((sCameraPreviewArraySize==0) || (sCameraPreviewArraySize!=size)) {
                if (sCameraPreviewArraySize!=0) env->DeleteGlobalRef(sCameraPreviewArrayGlobal);
                sCameraPreviewArraySize=size;
                jbyteArray mCameraPreviewArray = env->NewByteArray(size);
                sCameraPreviewArrayGlobal=(jbyteArray)env->NewGlobalRef(mCameraPreviewArray);
                env->DeleteLocalRef(mCameraPreviewArray);
            }
            if (sCameraPreviewArrayGlobal == NULL) {
                LOGE("Couldn't allocate byte array for JPEG data");
                env->ExceptionClear();
            } else {
                env->SetByteArrayRegion(sCameraPreviewArrayGlobal, 0, size, data);
            }
        } else {
            LOGE("image heap is NULL");
        }
    }
    // post image data to Java
    env->CallStaticVoidMethod(mCameraJClass, fields.post_event, mCameraJObjectWeak, msgType, 0, 0, sCameraPreviewArrayGlobal);
}

If the buffer has the wrong size a new buffer is allocated. Otherwise the buffer is just reused. This hack has definitely some nasty side effects in common situations. However, to be nice we should delete the global refference to our buffer when the camera is released. Therefore, I add the following code to the end of android_hardware_Camera_release:

if (sCameraPreviewArraySize!=0) {
    Mutex::Autolock _l(sPostDataLock);
    env->DeleteGlobalRef(sCameraPreviewArrayGlobal);
    sCameraPreviewArraySize=0;
}

Finally, I have to change the mutex used in the function postData. The Java patch below avoids passing the camera image to another thread. Therefore, the thread that calls postData is the same thread that calls my Java code. To be able to call camera functions from that Java code I need another mutex for postData. Usually the mutex mLock is used through the line: Mutex::Autolock _l(mLock); and I replace this line with Mutex::Autolock _l(sPostDataLock);.

Outsmart Android’s message queue

Unfortunately this is only the first half our customization. Somewhere deep inside the system probably at the driver level (been there once – don’t want to go there again) is a thread which pumps the camera images into the system. This call ends up in the Java code of Camera.java. Thereby the frame is delivered to the postEventFromNative method inside Camera.java. However, afterwards the frame is not delivered directly to our application but takes a detour via Android’s message queue. This is pretty ugly if we reuse our frame buffer. The detour makes the process asynchronous. Since the buffer is permanently overwritten this leads to corrupted frames. If you want to avoid this detour this must be changed. The easiest solution (for me) is to take the code snippet that handles this callback from the method handleMessage:

            case CAMERA_MSG_PREVIEW_FRAME:
                if (mPreviewCallback != null) {
                    mPreviewCallback.onPreviewFrame((byte[])msg.obj, mCamera);
                    if (mOneShot) {
                        mPreviewCallback = null;
                    }
                }
                return;

and move it to the method postEventFromNative.

	if (what==CAMERA_MSG_PREVIEW_FRAME) {
                if (c.mPreviewCallback != null) {
                    c.mPreviewCallback.onPreviewFrame((byte[])obj, c);
                    if (c.mOneShot) {
                        c.mPreviewCallback = null;
                    }
                }
                return;
	}

This might have some nasty side effects in some not so specific situations. If you done all that you might want to join the discussion about Issue 2794 and propose an API change in the Camera API: Excessive GC caused by preview callbacks thread to find a proper solution for the Camera Preview Callback memory Issue (and leave a comment here if you have a better solution).
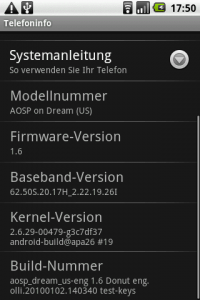
Baking a Donut for a Dream

As Android 2.0 will probably be available for the G1/HTC Dream soon I decided to keep up with the times and update to Android 1.6. Testing different Donut releases such as cyanogenmod and the vanilla htc version frustrated me. Support for processing camera images is still rubbish because of permanent memory allocation and garbage collector runs. Thus, I decided to bake my own donut. The guide below is heavily based on Johan de Koning’s Building Android 1.5 series and the Building For Dream Or Sapphire documentation.

Collecting the tools

In order to build and deploy your own Android 1.6 you need:

  • A G1 with Android 1.6 and a boot image with enabled fastboot
  • A computer with a recent Ubuntu or Windows with > 14GB free hard disk and > 2GB RAM

Using Windows 7 I downloaded and installed VirtualBox 3.1.2. The virtual machine needs around 14GB hard disk and 2GB RAM. To install a Linux I downloaded Ubuntu 9.10 mounted the ISO image and installed Ubuntu inside VirtualBox. It’s also a good idea to install the VirtualBox Guest Additions and create a shared folder to exchange data with the host machine. My folders sharename is exchange and can be mounted by typing the following into a terminal:

sudo mount -t vboxsf exchange /mnt

Next step is to install all kinds of stuff to be able to download things conveniently and compile the system:

sudo apt-get install git-core gnupg flex bison gperf libsdl-dev libesd0-dev libwxgtk2.6-dev build-essential zip curl libncurses5-dev zlib1g-dev

We also need Java but some parts of the source tree are (still) not compatible with Java6 and Java5 is not available as a package for Ubuntu 9.10. Following the Enea guys I used packages from the previous Ubuntu version Jaunty Jackalope. You first have to add the Jaunty repositories to your source list by typing:

sudo gedit /etc/apt/sources.list

in a terminal and add the following lines:

deb http://us.archive.ubuntu.com/ubuntu/ jaunty multiverse
deb http://us.archive.ubuntu.com/ubuntu/ jaunty-updates multiverse

Afterwards Java5 can be installed by typing:

sudo apt-get update
sudo apt-get install sun-java5-jdk

We need two additional tools to proceed. We will create a bin folder in our in our home directory:

cd ~
mkdir bin

The first tool is repo. We download it and make it executable:

curl http://android.git.kernel.org/repo >~/bin/repo
chmod a+x ~/bin/repo

The second tool is unyaffs a program that extracts files from a yaffs file system image.

curl http://unyaffs.googlecode.com/files/unyaffs >~/bin/unyaffs
chmod a+x ~/bin/unyaffs

We put the bin folder in our path by adding the following line to the .bashrc:

export PATH=${PATH}:~/bin:~/android-sdk-linux_86/tools

Getting the source and proprietary apps

Next step is to download the source code using repo and git. However, first we will create a folder for our source tree and then we can check out the donut sources:

mkdir mydroid
cd mydroid
repo init -u git://android.git.kernel.org/platform/manifest.git -b donut-plus-aosp
repo sync

This will take a while, time to buy a six-pack (needed when we’ll compile the system). When the check out finished (and you’re not to drunken) we can proceed.

To grab some proprietary binaries from your device which can’t be distributed due to legal reasons (whatsoever). Download the “HTC Proprietary Binaries for ADP1” from HTC’s developer site, add it to your source tree in vendor/htc/dream-open/ and decompress it. Afterwards you have to connect your Android 1.6 equipped G1 to your computer and make the device available to the virtual machine. Then execute the file from the vendor/htc/dream-open/ directory.

We also need the Android 1.6 recovery image which was available from http://developer.htc.com/adp.html a while ago. Unfortunately the links are dead now (but the files are still there…). At the time of writing you could get it by typing at the root of your source tree:

wget --referer="http://developer.htc.com" http://member.america.htc.com/download/RomCode/ADP/signed-dream_devphone_userdebug-ota-14721.zip

From the vendor/htc/dream-open/ directory run the “unzip-files.sh” script to unzip some proprietary files for your device.

Since we need some Google Applications which are not open source (e.g. the Market, Google Maps, …) we will extract them from the system image which we can download using:

wget --referer="http://developer.htc.com" http://member.america.htc.com/download/RomCode/ADP/signed-dream_devphone_userdebug-img-14721.zip

Inside your home directory create the folder htc and extract the zip file to this folder. Afterwards we can extract the system.img using unyaffs:

cd ~/htc
unyaffs system.img

To copy the apps to your source tree execute the attached copy_google_apps.sh script. In addition, you have to edit the build script to include these apps by replacing ~/mydroid/vendor/htc/dream-open/htc_dream.mk by an extended device_dream.mk.

Now execute the envsetup.sh script from the root of your source tree and run “lunch aosp_dream_us-eng” to specifically configure the build system for the G1/Dream.

. build/envsetup.sh
lunch aosp_dream_us-eng

The output should look like this:

============================================
PLATFORM_VERSION_CODENAME=REL
PLATFORM_VERSION=1.6
TARGET_PRODUCT=aosp_dream_us
TARGET_BUILD_VARIANT=eng
TARGET_SIMULATOR=false
TARGET_BUILD_TYPE=release
TARGET_ARCH=arm
HOST_ARCH=x86
HOST_OS=linux
HOST_BUILD_TYPE=release
BUILD_ID=Donut
============================================

Compile and deploy

Finally grab the beer go to the source of your build tree and type

make

If everything went well you find the result in the out/target/product/dream-open directory. If you want to deploy it on your G1 you have to boot into fastboot mode (shut down the device and power it up again while holding the BACK key). The fastboot tool is part of the Android SDK but can also be downloaded from HTC. I copied the files to Windows but you could probably also flash them directly from Ubuntu:

fastboot flash boot boot.img
fastboot flash system system.img
fastboot flash recovery recovery.img
fastboot flash userdata userdata.img
fastboot reboot

The first start will take some time but you can follow the process with adb:

adb logcat

You should end up with a system that hopefully looks and behaves just like a vanilla Donut release. Time to change the source and do some serious stuff.

Camera image as an OpenGL texture on top of the native camera viewfinder

I played a bit with the camera viewfinder on my G1 which is usually displayed directly by the camera driver. I hoped that I could synchronize the driver’s camera frame rendering with my own processing and visualization. After an hour or so later I now assume that this is not possible at the moment. However, while playing around I extended the example below as you can see in these screenshots.

OpenGL Camera ScreenshotOpenGL Camera Screenshot

An OpenGL cube textured with the camera frame is rendered on top of the standard camera viewfinder. Thus, the standard camera image in the background is colored while the the cube is only grayscale. I worry that I have to make the OpenGL texture colored as well soon. I also cleaned up the source code a bit by extending GLSurfaceView instead of doing most of the OpenGL stuff myself and using a SurfaceView. I uploaded an updated version to the android market (direct link to the android market). You find the sourceode here.

Showing camera images with OpenGL on Android example

I fiddeled a small example together that shows how to get images from the camera and render them with OpenGL. The example is for Android phones and consists of three classes:

  • GLCamTest is the application’s main Activity. It does nothing special apart from putting the app in fullscreen mode and creating a GLLayer object as well as a Preview object.
  • The Preview class handles the camera. In particular, the method setPreviewCallback is used to receive camera images. The camera images are not processed in this class but delivered directly to the GLLayer. This class itself does not display the camera images.
  • GLLayer uses OpenGL ES to render the camera’s viewfinder image on the screen. Unfortunately I don’t know much about OpenGL (ES). The code is mostly copied from some examples. The only interesting stuff happens in the main loop (the run method) and the onPreviewFrame method.

Furthermore, we have the BooleanLock class which is completely boring. I uploaded the eclipse project containing the source code. I have only tested it on the emulator and with my tuned G1 not sure if it works with normal devices.

I just tested it on a normal G1. Performance is horrible; the Garbage Collector jumps in a few times per second and stops the video. It’s because of the Camera Preview Callback memory Issue. Unfortunately I assume that this can’t be changed without touching the firmware. I also uploaded the example to the Android Market.

Processing camera frames on Android

Recently I wanted to process and display camera frames using my Android G1. I’ve done similar things using Python on S60 and Windows Mobile 6 and expected it to be quite easy on the G1 as well. As first step I extended a SurfaceView that uses the camera and calls setPreviewCallback to register a onPreviewFrame callback and receive images from the camera as described in several tutorials. The camera frames are then displayed via my SurfaceView and I receive the according data as well.

However, I wanted to keep the processing of the frames and displaying the frames in sync. With the simple approach this is not possible because the onPreviewFrame is not synchronized with displaying the frames. My alternative was to not display the frames with the SurfaceView directly but convert the received image data to an OpenGL texture and render the camera viewfinder with OpenGL ES. This works surprisingly fast on my G1. In the video below I render the camera frames on an OpenGL rectangle to get some fancy effects.

My viewfinder is grayscale because I only copy the luminance part of the camera frames (which is encoded in a YUV colour space) to the OpenGL texture. Decomposing also the U and V part is probably a bit slower. Copying a 160×240 YUV frame to a 256×256 luminance array (which is used to create the texture) is very simple and looks as follows.

public static void yuvToLum160x240(byte[] yuv, byte[] lum) {
int lumCount=0;
int yuvCount=0;
for (int y=0;y<160;y++) {
System.arraycopy(yuv, yuvCount, lum, lumCount, 240);
yuvCount=yuvCount+240;
lumCount=lumCount+256;
}
}